


-
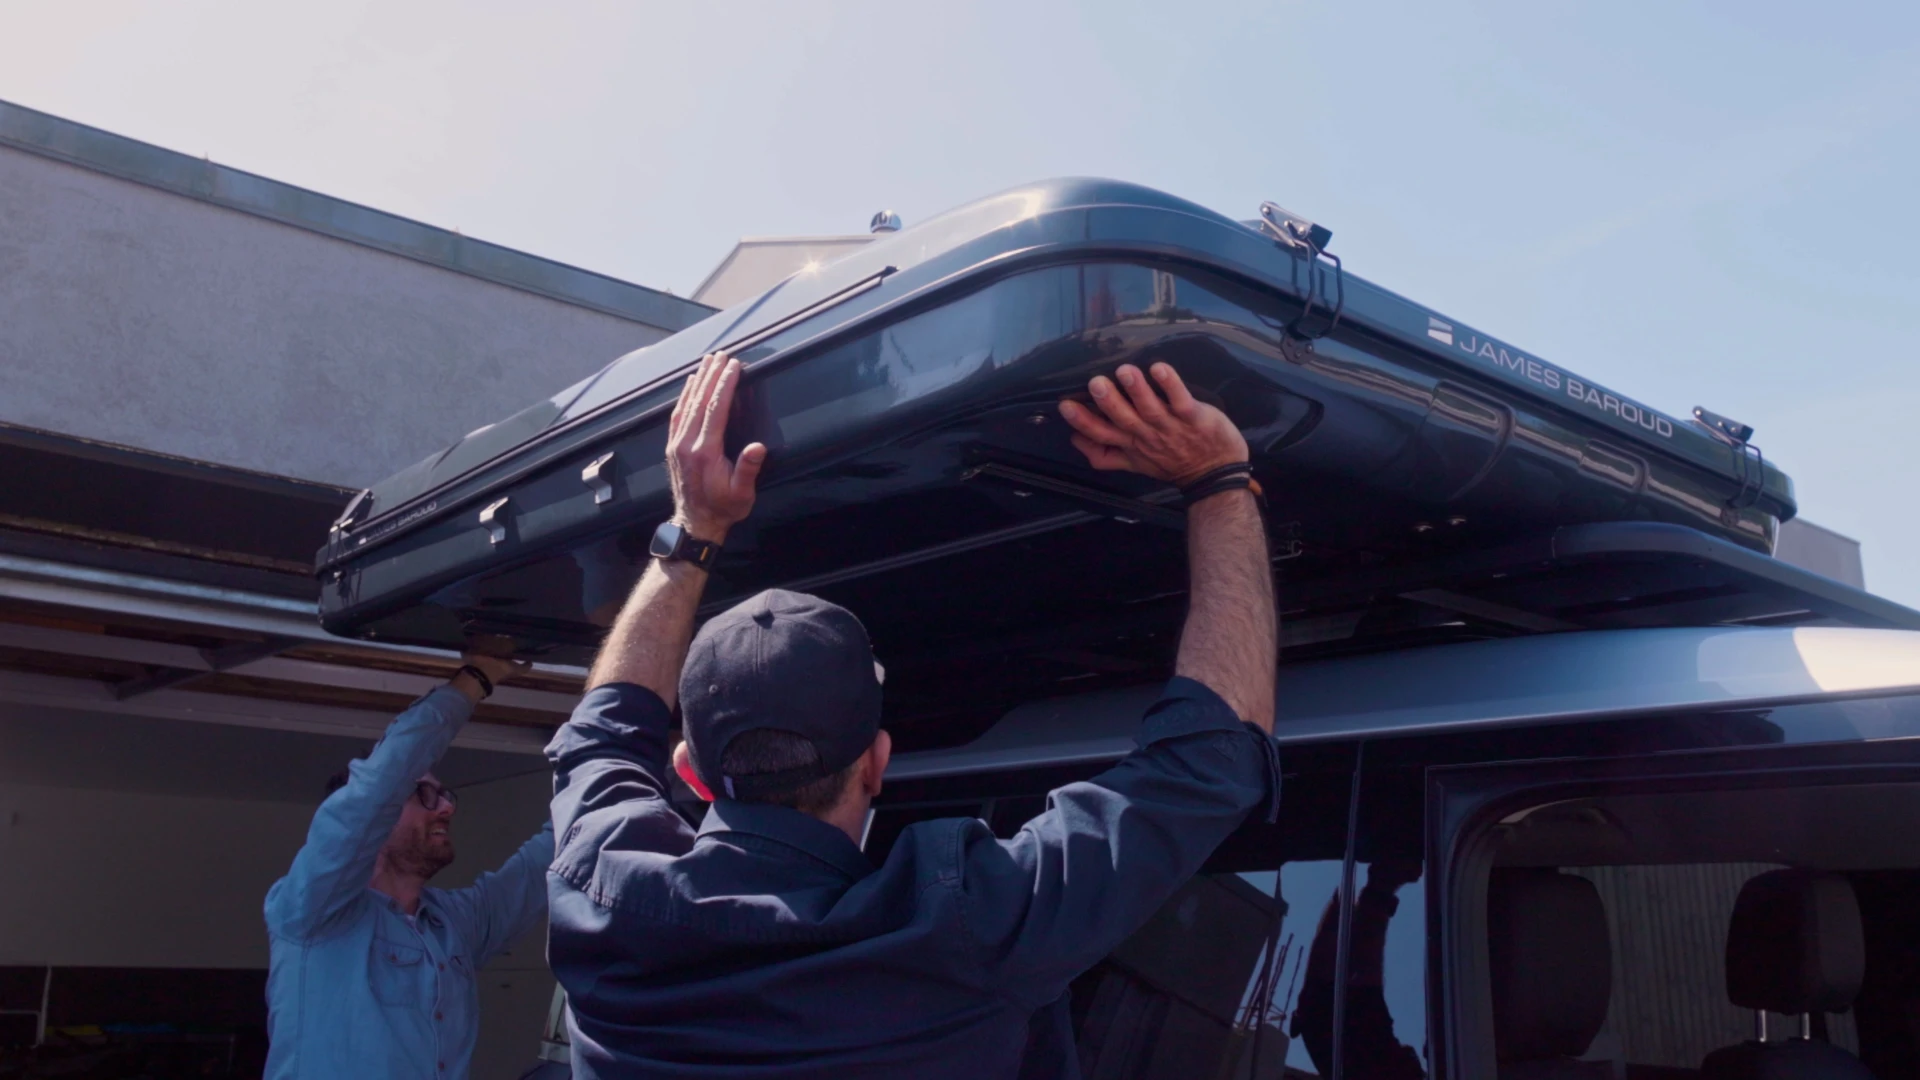
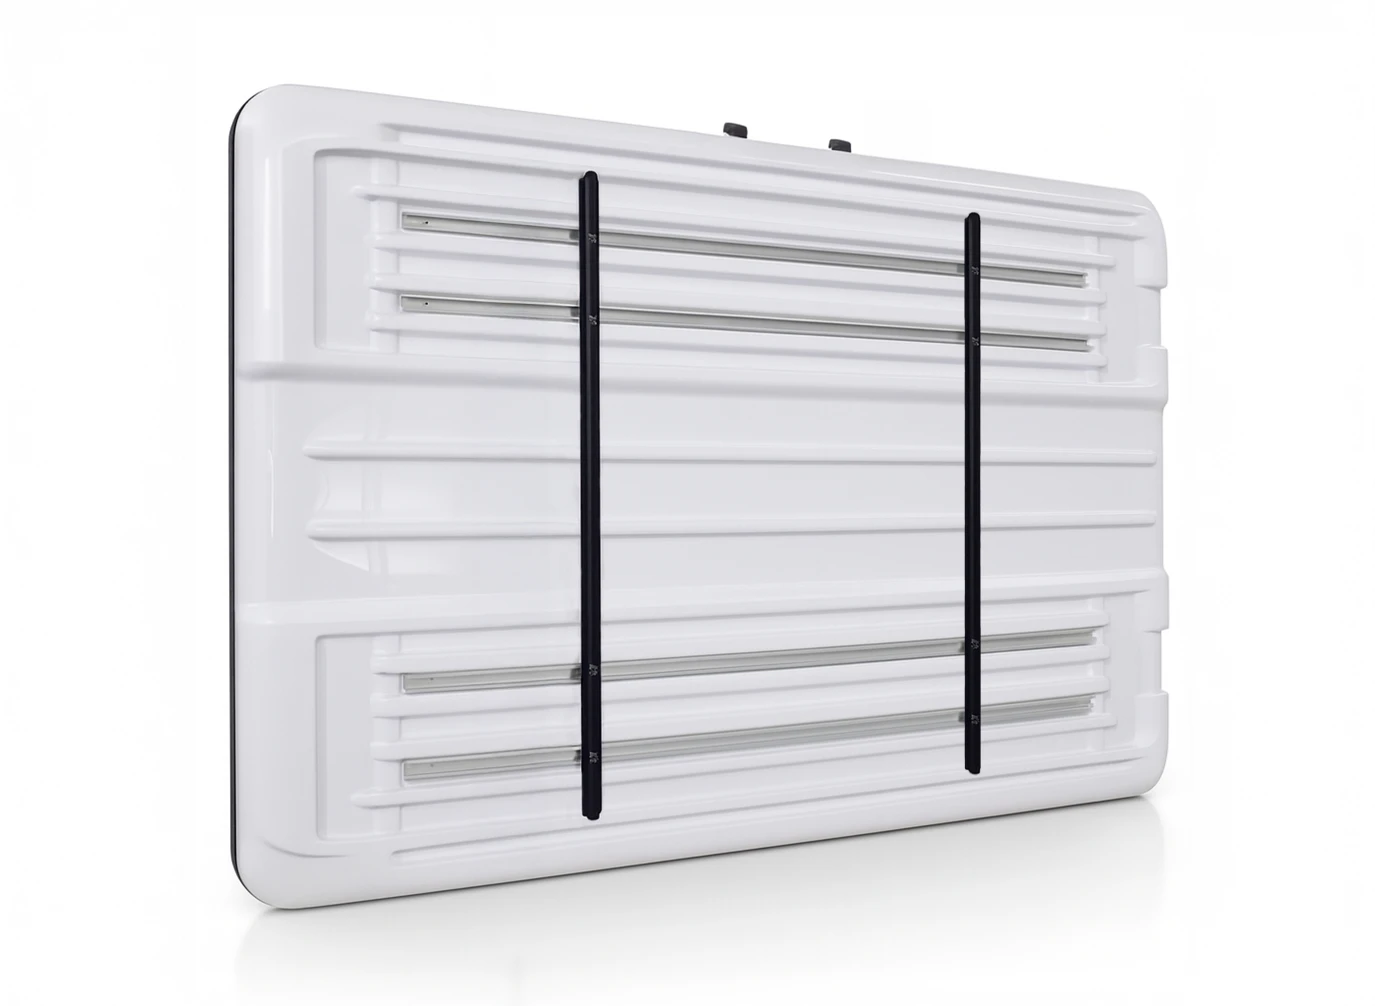

James Baroud
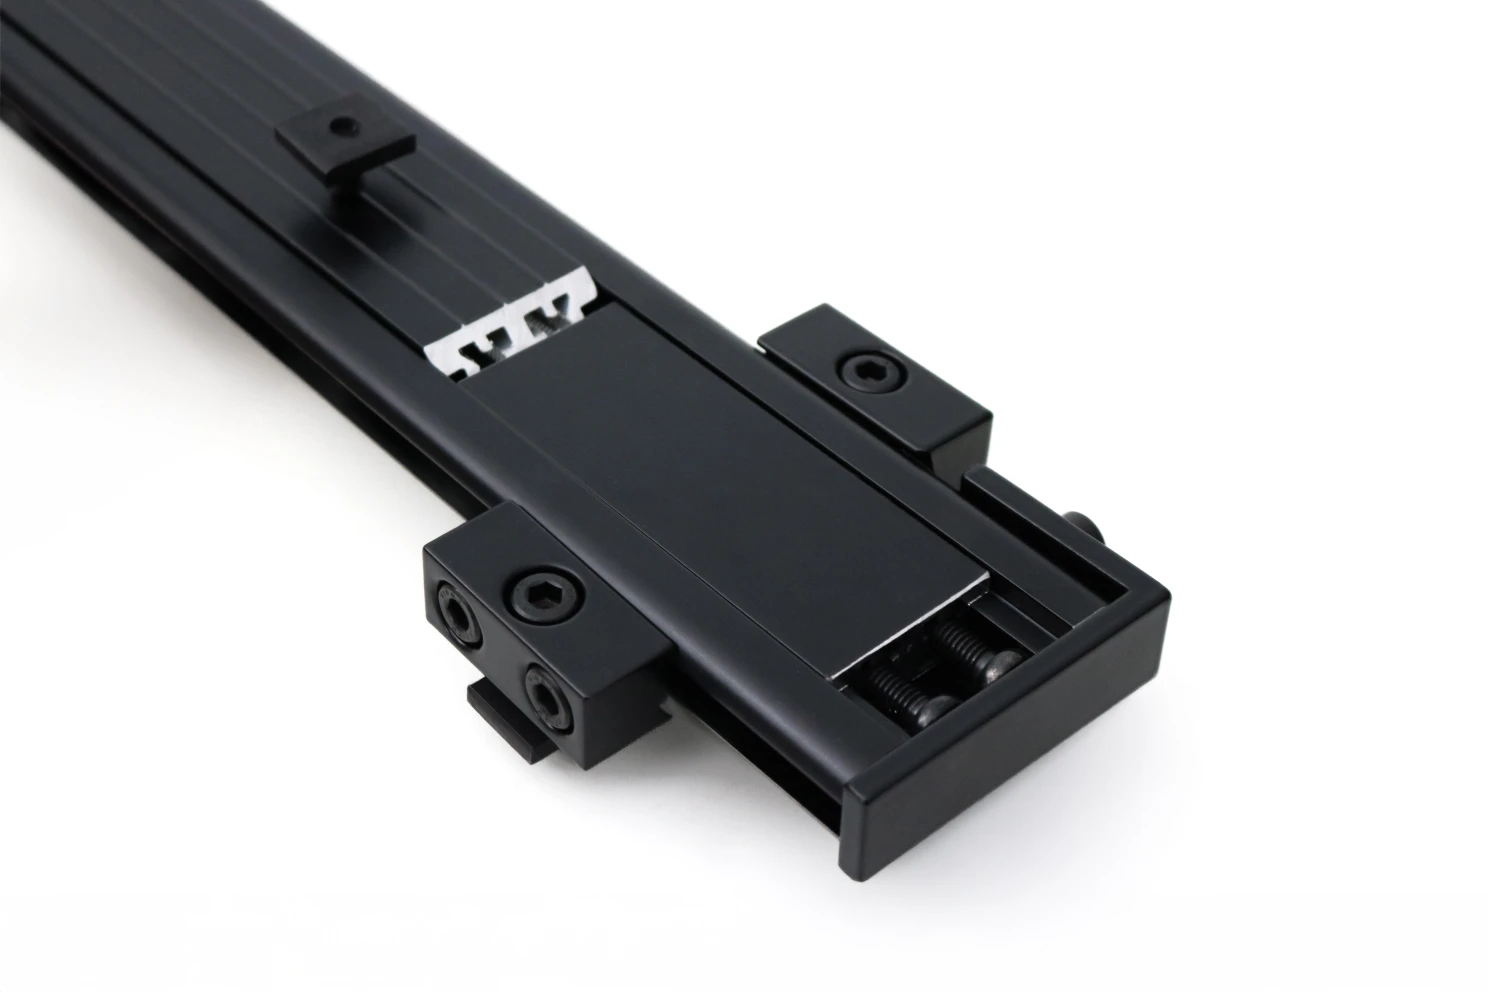
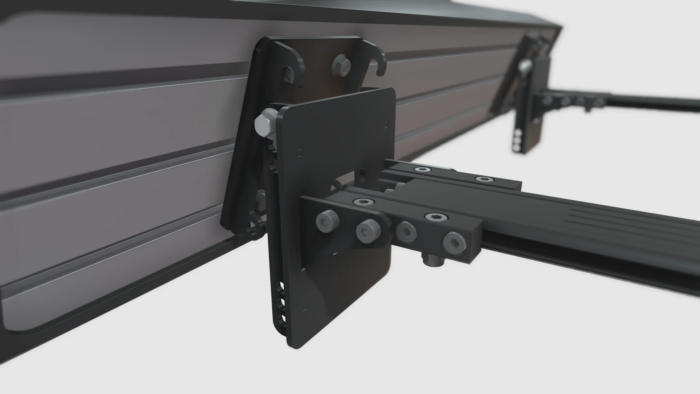
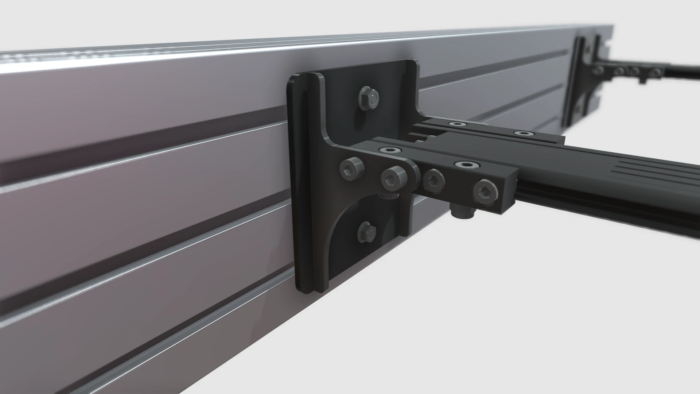
Quick Release Bars
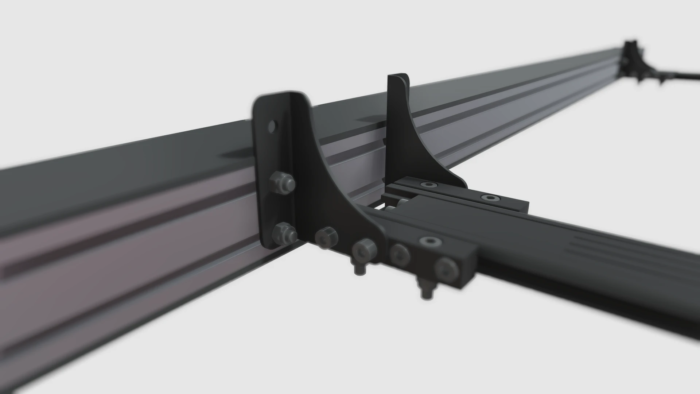
Easy installation on most platforms or rack systems, quick to to take your tent on and off, and can have awnings mounted directly into it, the Quick Release Bars were made to simplify rooftop tent builds.
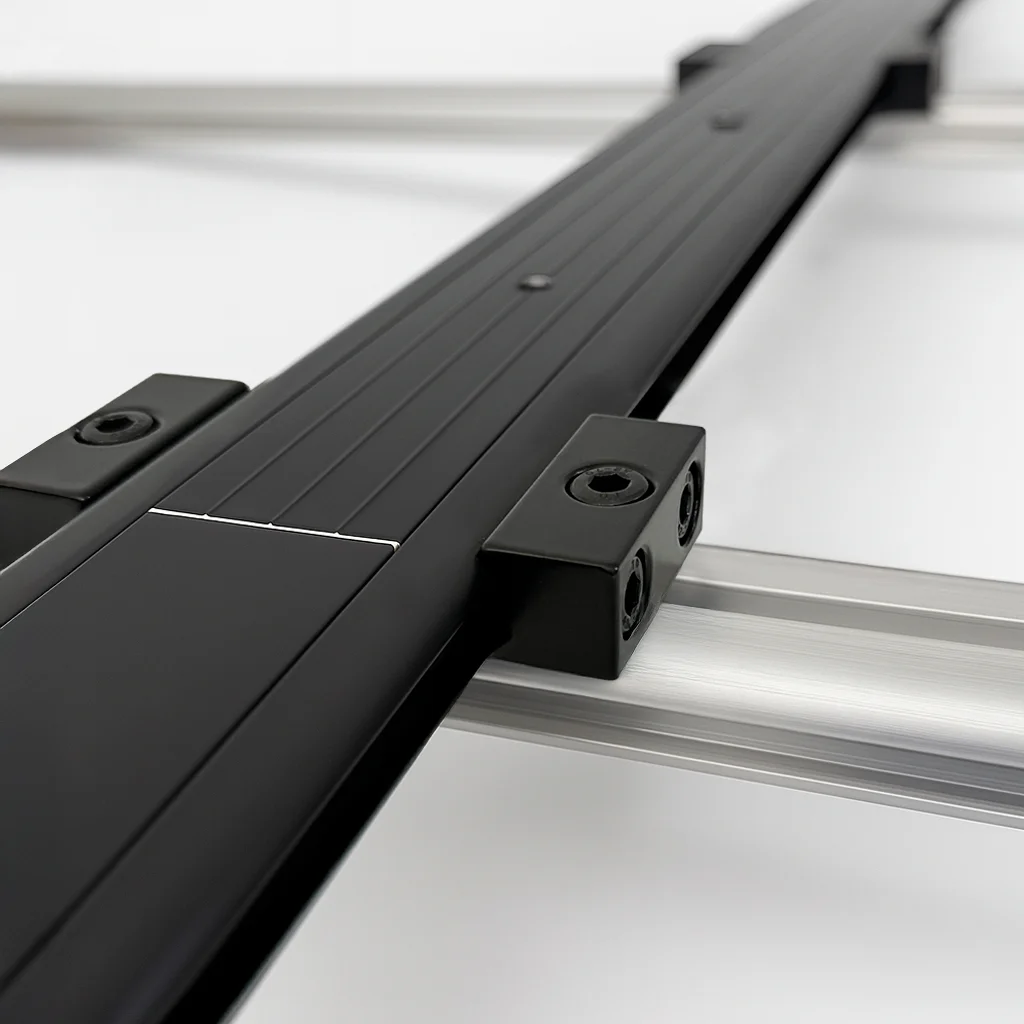
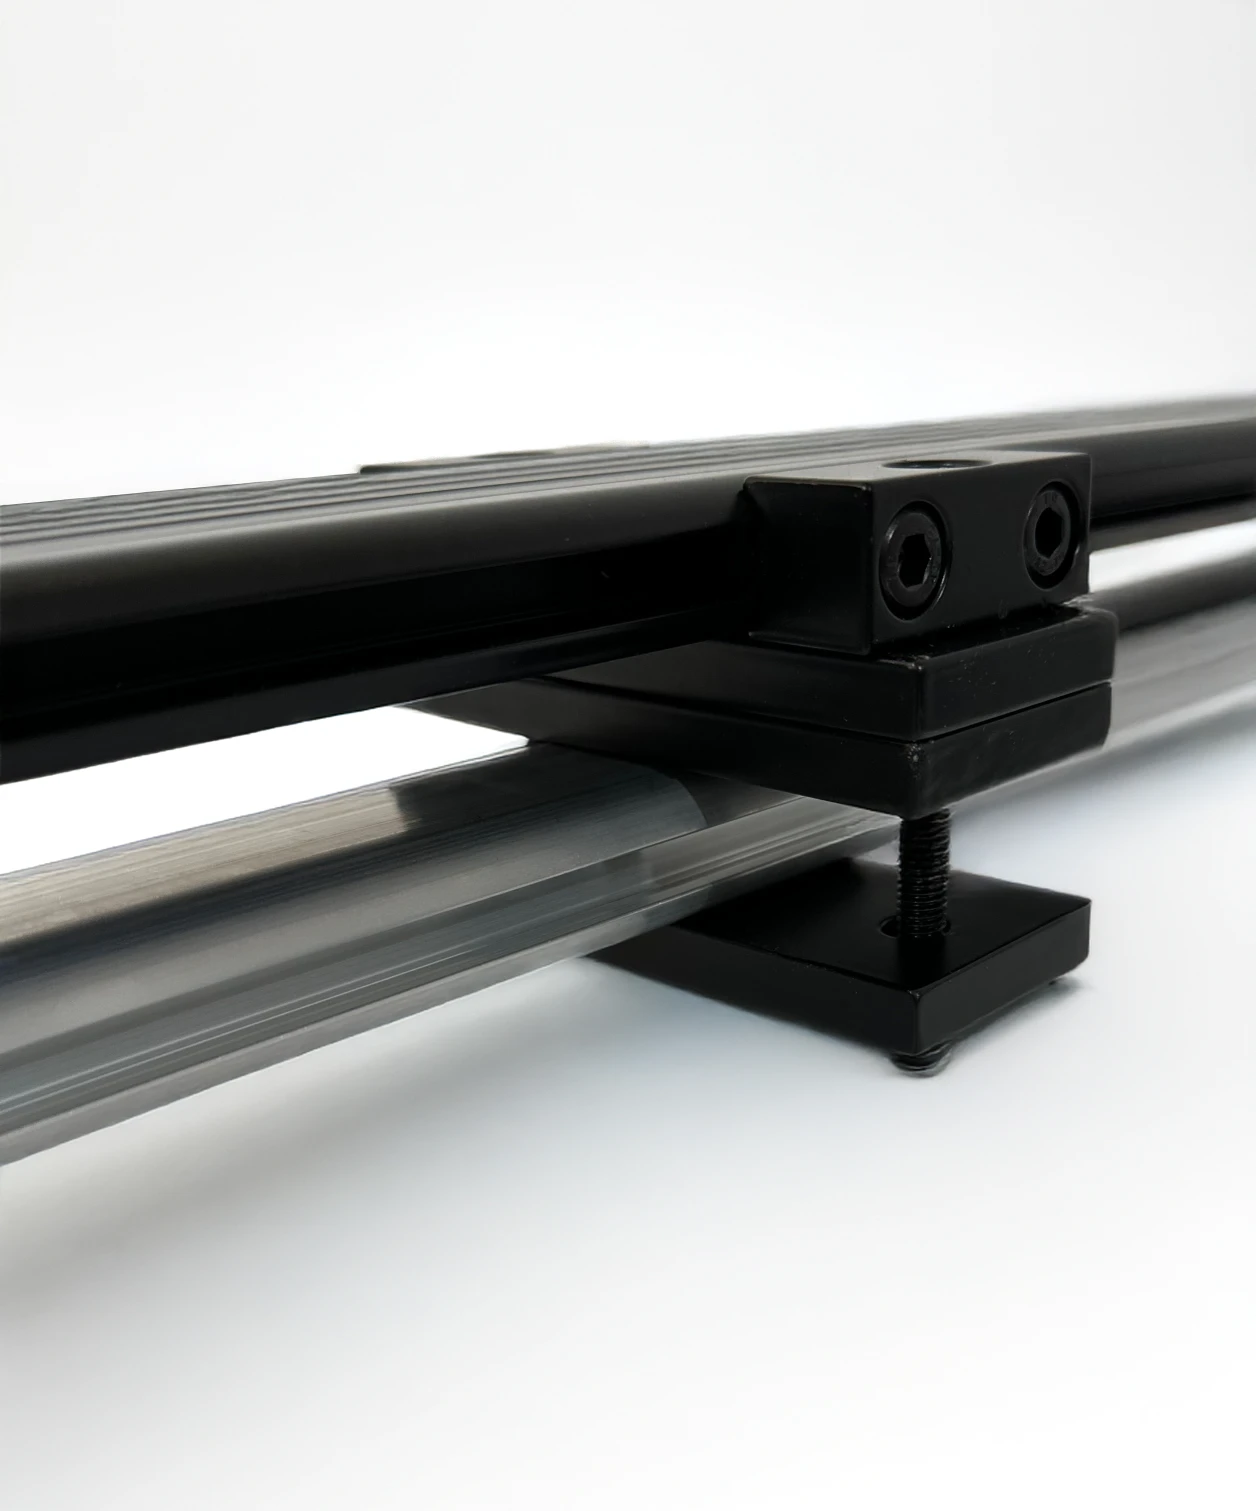
Made with military grade aluminum and precision engineering, one profile mounts to the tent, and the other to your platform, rack or bars. Once aligned, the tent slides into place and tightens from the sides (not from the bottom), avoiding the awkward under-rack access of traditional systems.
Sold individually. Add 2 units for most setups, or 3 units for XL tents and more demanding off-road use.
Compatible with most roof bars and rack platforms using the included hardware, while adding only 20 mm ( 0.8 in ) of height.
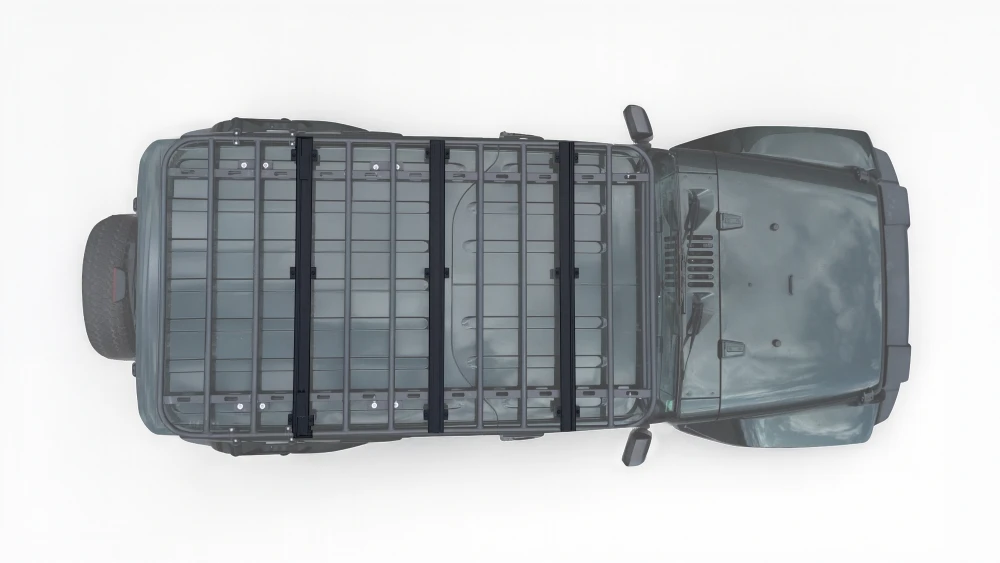
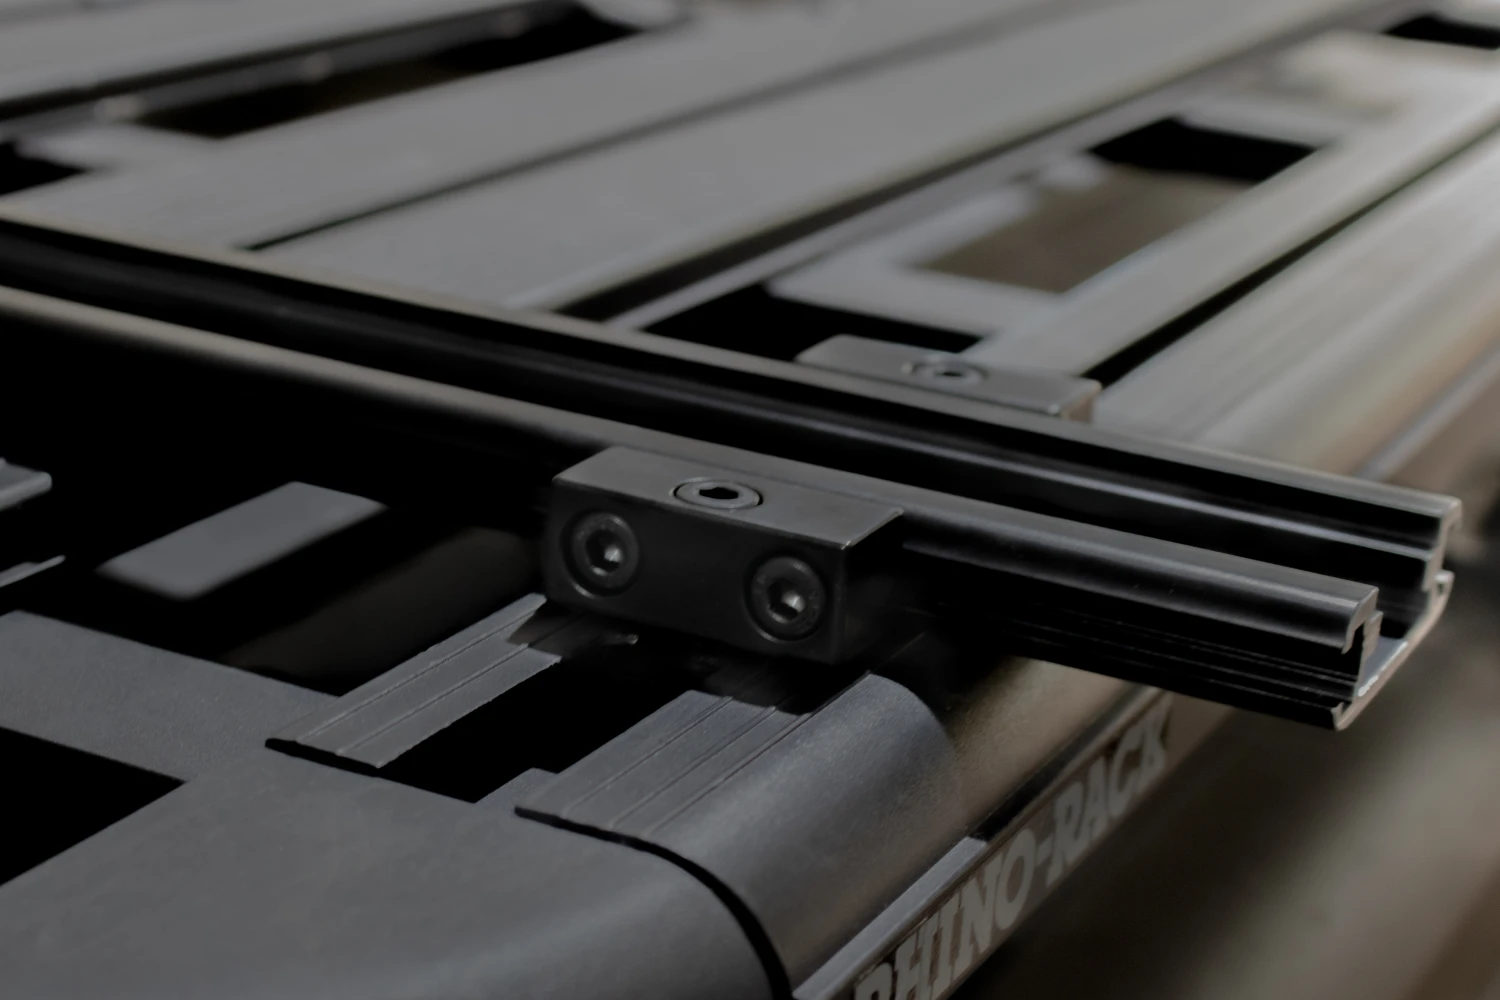
For racks, install through the rack channels on platforms such as Sherpa, Front Runner, Rhino-Rack, ARB and Defender-style racks.
For bars, clamp directly to existing crossbars, or mount to Front Runner feet with an additional adapter ordered sepparately.
More information below.
Easy to set, Quick to camp
Get your setup adventure ready in a matter of minutes.
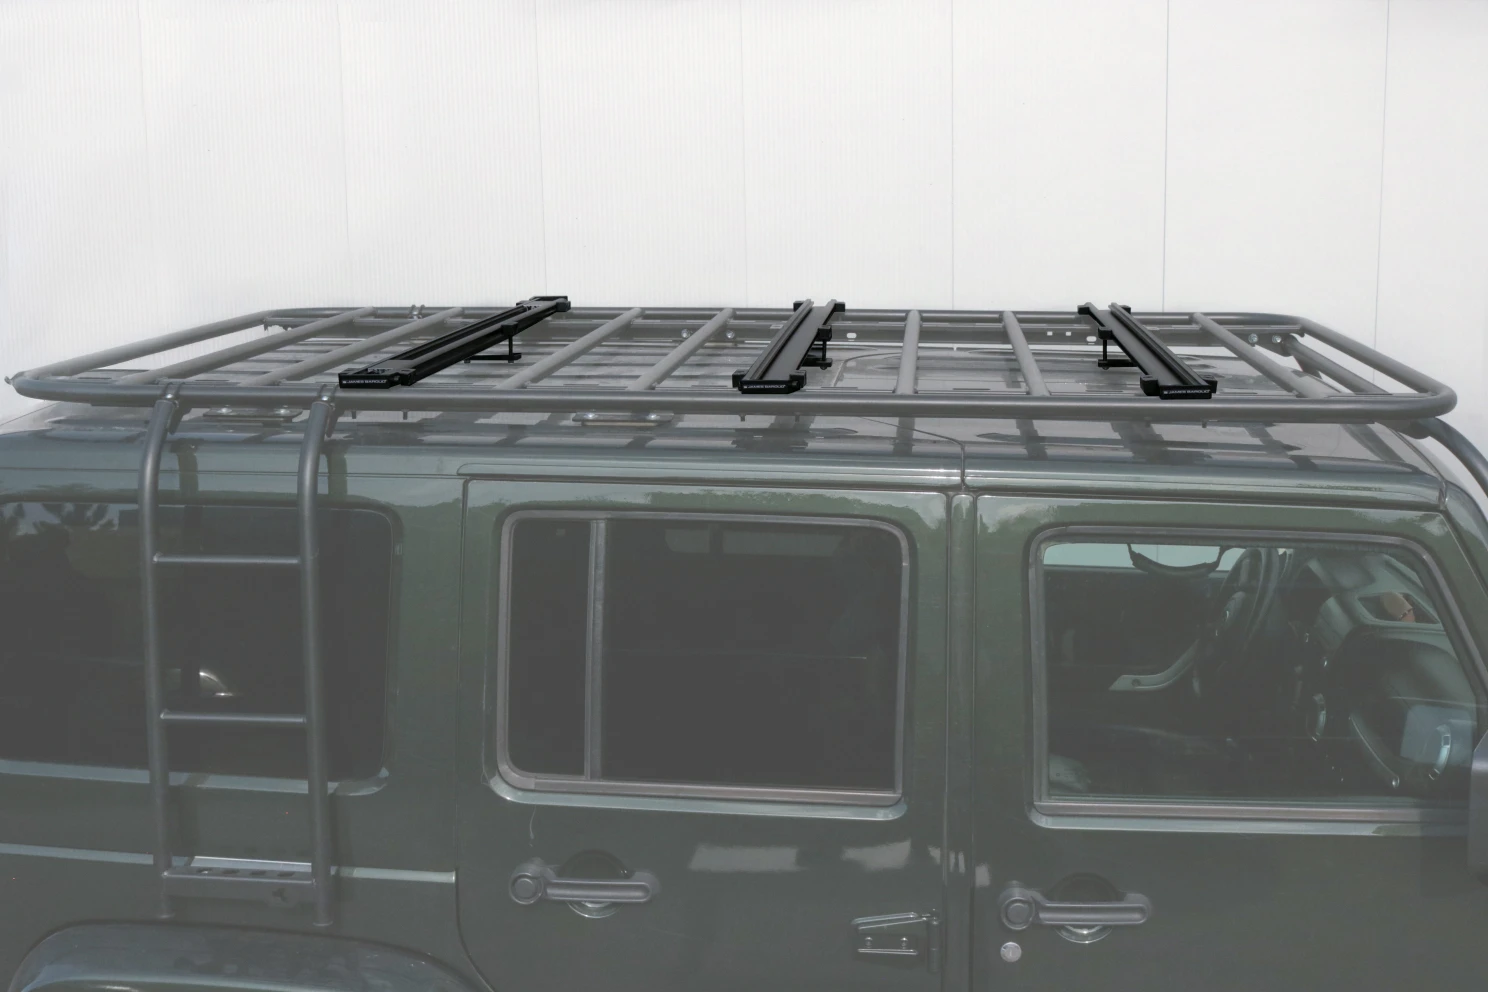
Platform Compatible
Thoughtfully designed to mount across most platforms and bars, without the need for custom brackets.
These are some of the rack and platform setups we have already tested.
Don’t see yours listed? Contact us and we’ll help confirm compatibility.
-
Rhino-Rack Leg adapter kit
If your vehicle is compatible with most Rhino-Rack leg models, this is one of the cleanest ways to mount your rooftop tent. Instead of buying a full rack platform or extra crossbars, the Rhino-Rack Leg Adapter connects the Quick Release Bars directly to the legs.
The result is a lighter, lower-profile, and more cost-efficient setup, built specifically around the Quick Release system. Add the adapter with your Quick Release Bars for a practical tent mounting solution without custom fabrication.
Each unit fits 1 Quick Release Bar
€50.00
Awning Attachments
Easily attach an awning to your setup with no complicated custom brackets.
-
Removable Falcon Brackets
Designed to be quickly attached and removed, these brackets fits the Falcon 270 Awning, Falcon Shower, or Family Room directly to the Quick Release Bars.
It not only solves the need for complicated or custom-made brackets, but also adds quick removal to the awning itself, allowing it to detach easily from the vehicle by loosening only two side bolts.
With 6 height options, it also helps align the Falcon, your tent and the vehicle.
Sold in packs of 2
€300.00
-
Fixed Falcon Brackets
Made for those that want a simple awning bracket solution, this fixed attachment allows the Falcon 270 Awning, Falcon Shower, or Family Room to mount directly to the Quick Release Bars.
It gives campers a clean and reliable solution without needing complicated or custom-made brackets, making it much easier to build a complete rooftop tent and awning setup.
Sold in packs of 2.
€225.00
-
Classic Awning Brackets
Designed for the James Baroud Classic Awning, this fixed attachment makes it much easier to add an awning to your Quick Release Bars without needing a custom bracket setup.
Installed in a matter of minutes and with 4 height options, it makes it easier to have an awning attached to any vehicle.
Sold in packs of 2.
€75.00
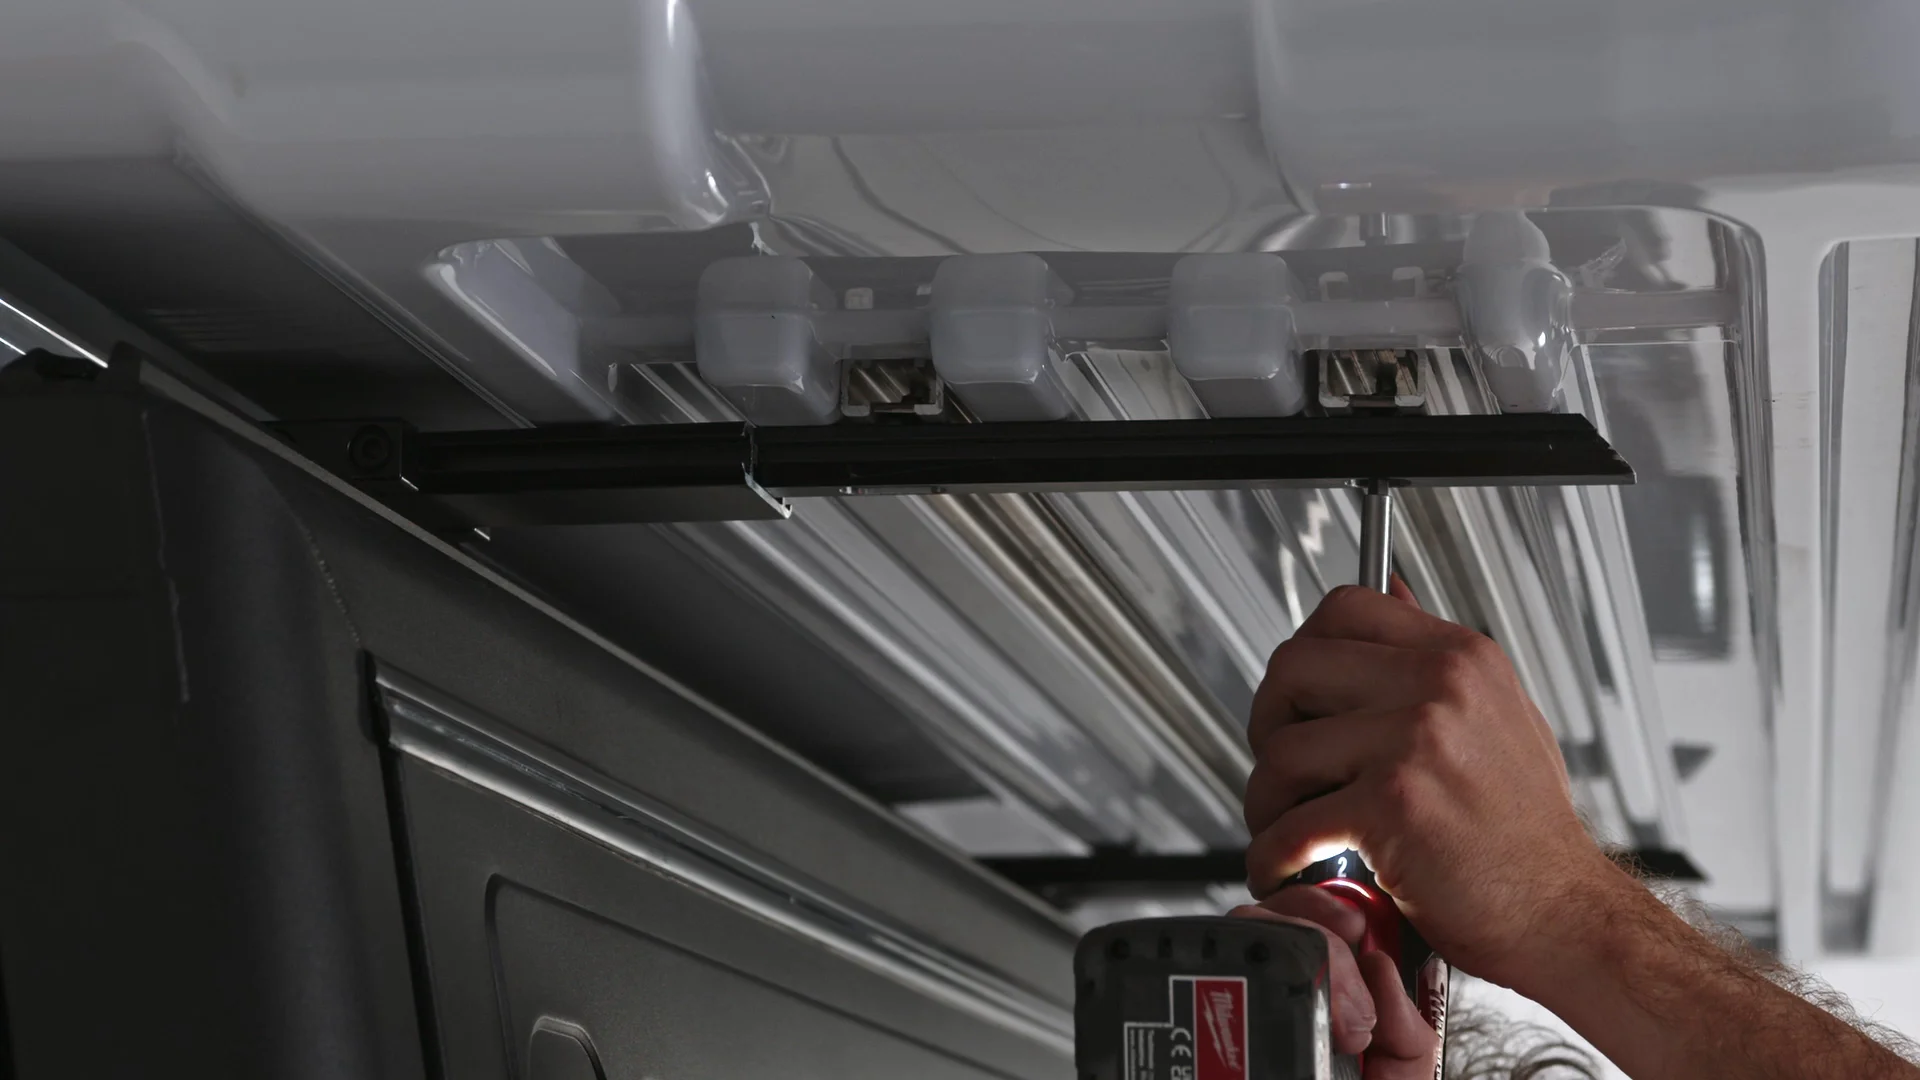
How to install
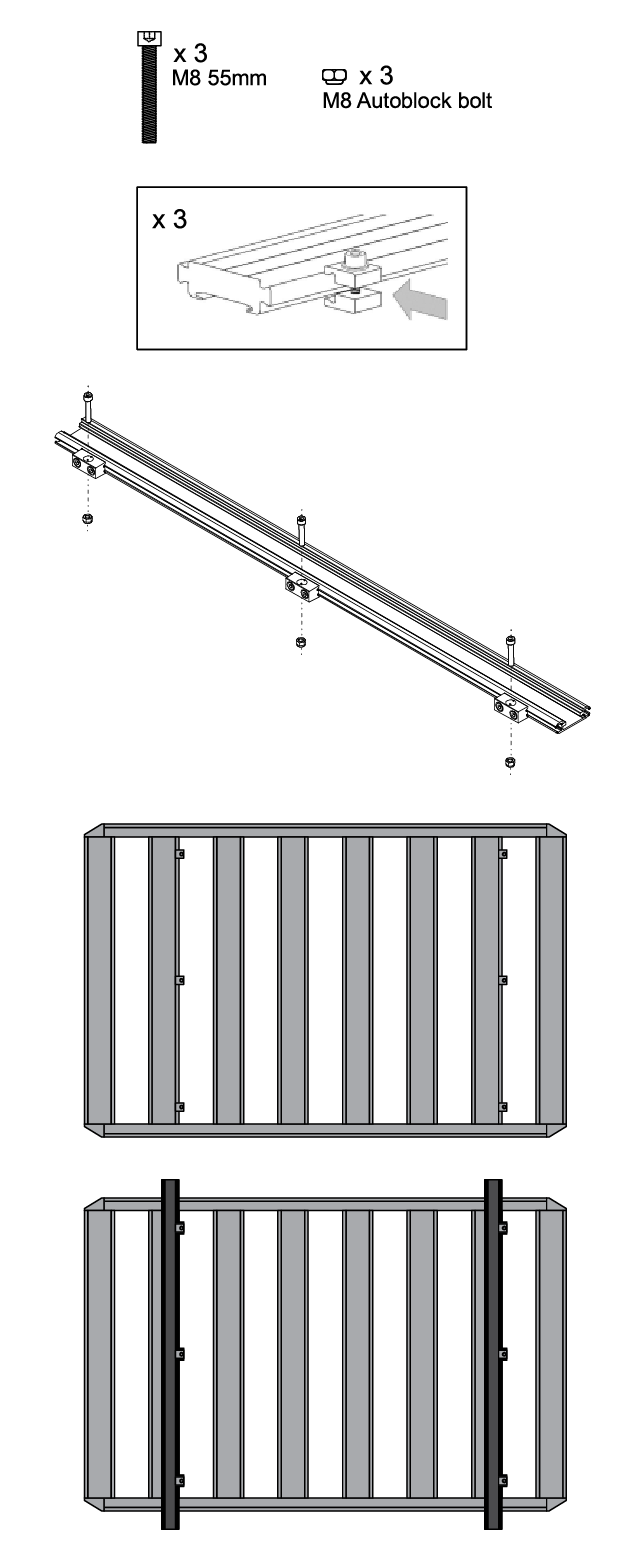
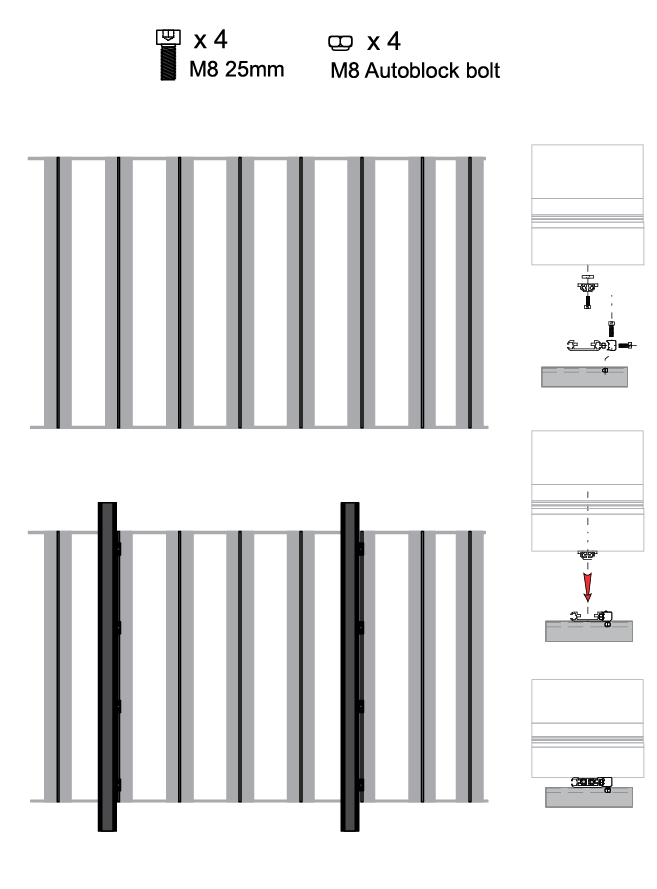
1
Install the thinner release bars onto the rooftop tent’s bottom mounting tracks
Place the tent on the side or upside down on a supported soft surface, and slide the smaller bar into the tent rail gutters. Do not tighten to full torque at this point.
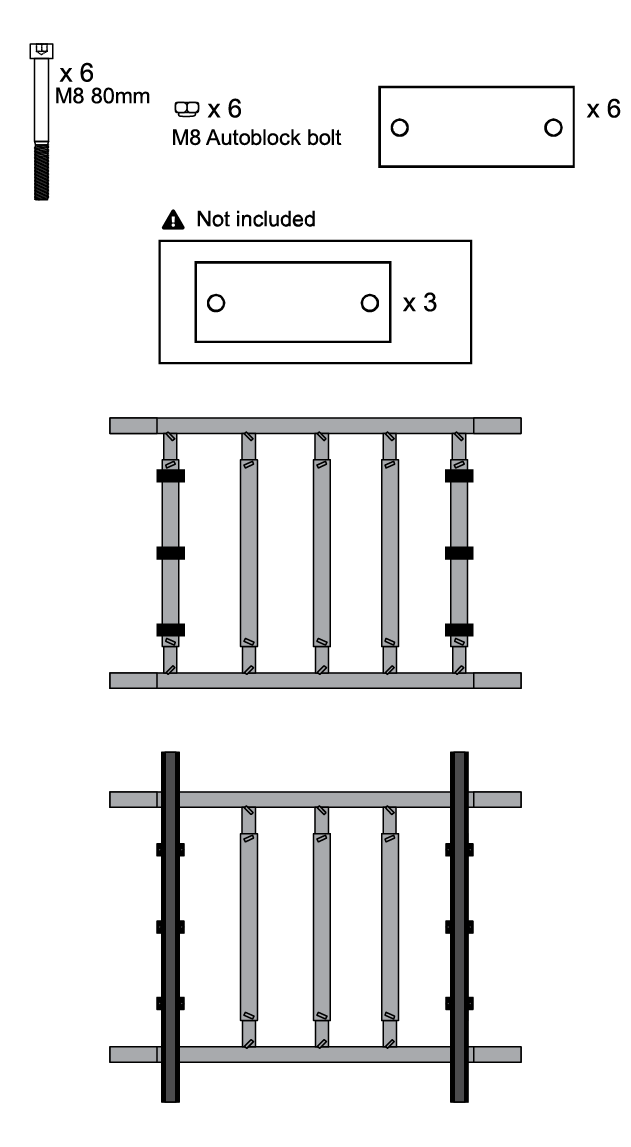
2
Tighten the wider receiving slot bars onto the crossbar or rack system
With the attachment pieces that slide along the side of the receiving slot bars, fix them tight to vehicles existing platform at the spacing recommended for your tent.
For bars, simply clamp the receiving bars into the existing bars with the included hardware.
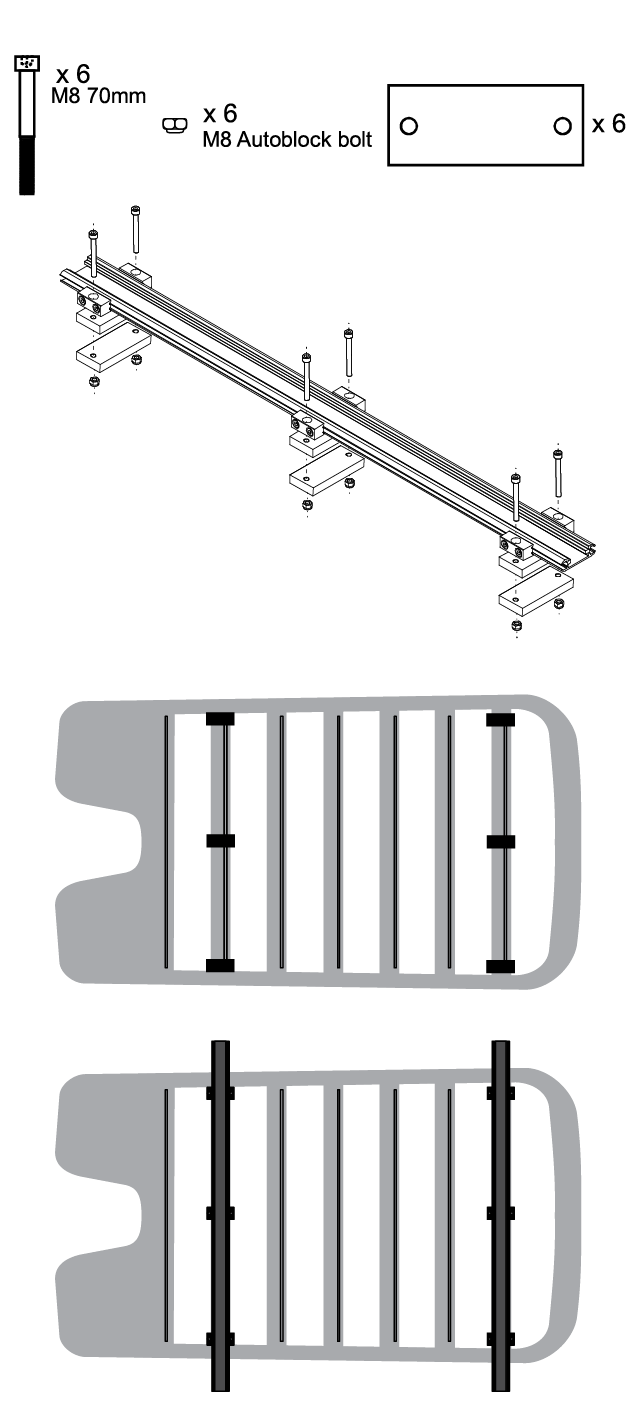
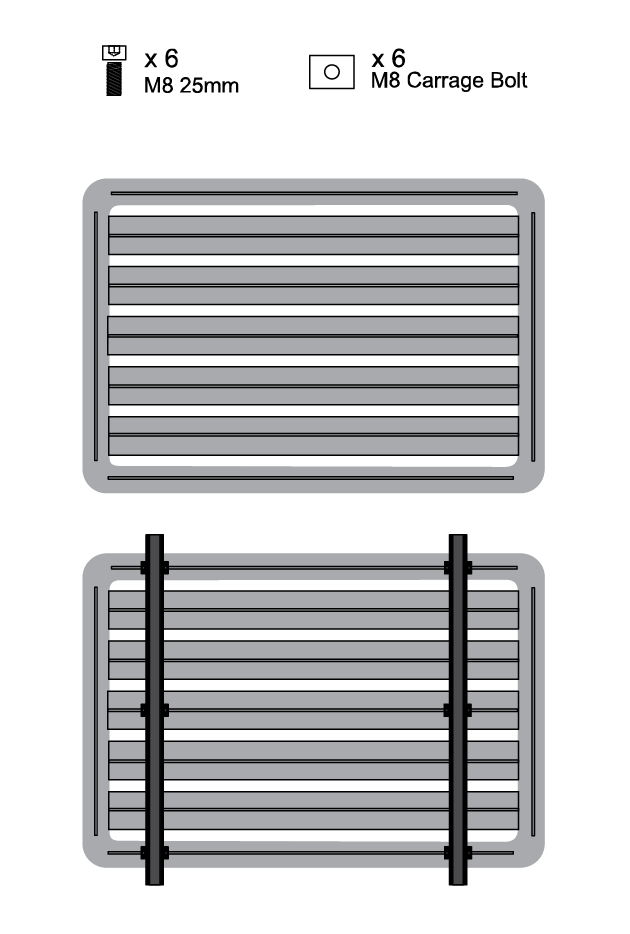
3
Slide the tent on top and align both sets of bars
Place the tent on top of the bars. Lift the tent to adjust the release bars into the receiving bars. Double check to ensure they fit properly.
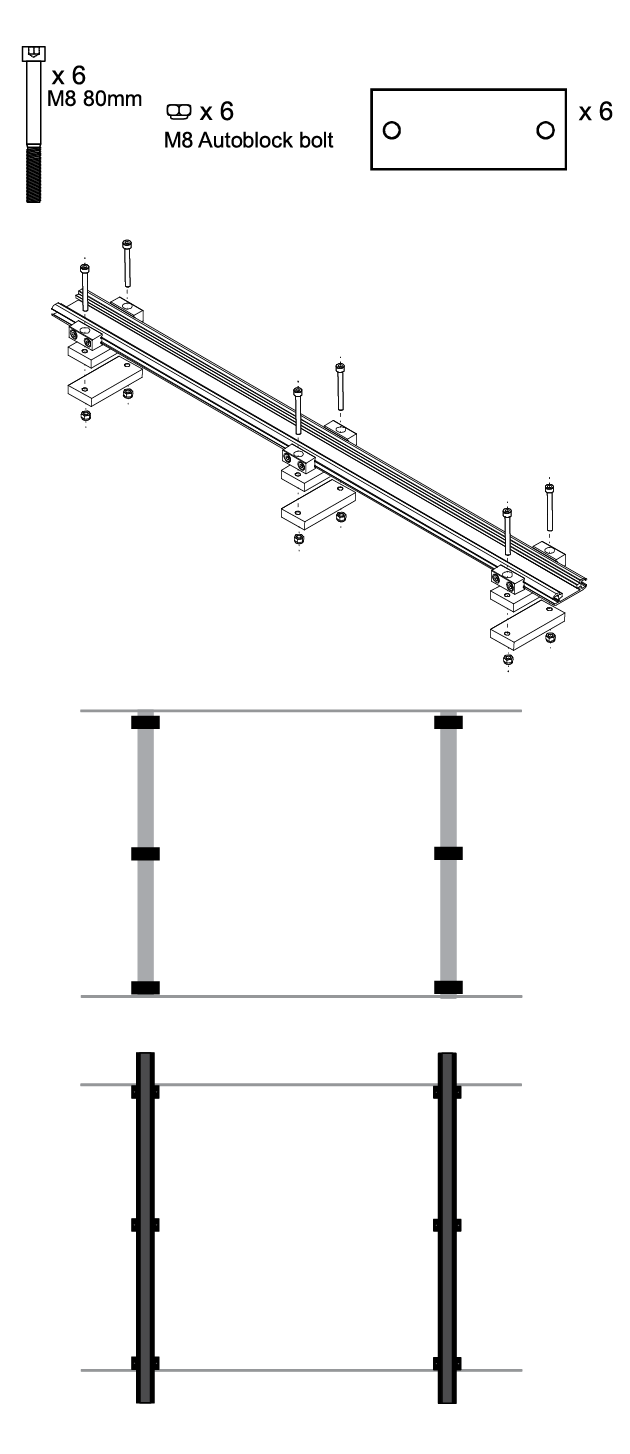
4
Tighten the rooftop tent bars and side bolts
From below, tilt up the tent just enough to see the bolt opening and tighten all the bolts of the release bar on both sides. Then lower the tent back into the receiving bar and tighten the side locks.
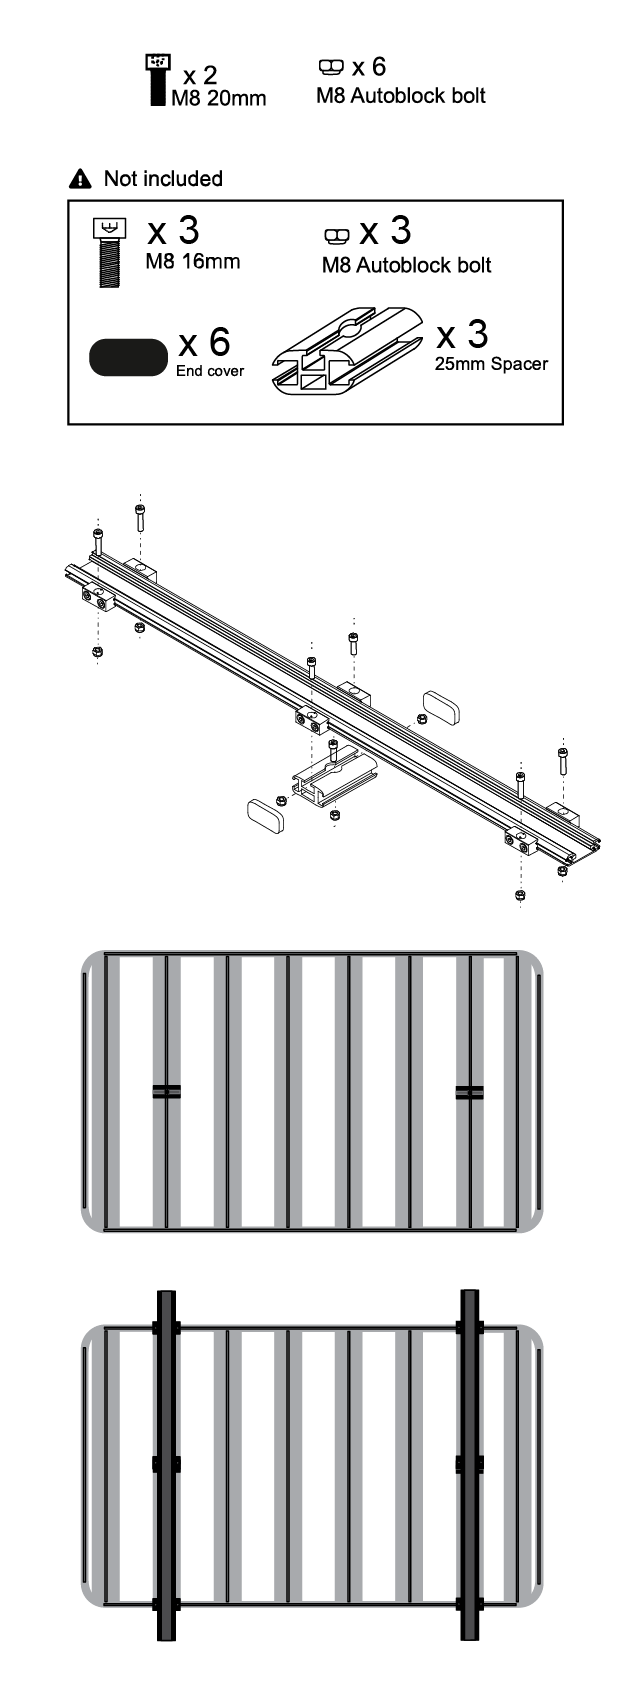
5
Lock it and you’re set!
Secure each end by bolting the safety cover and you’re good to go.
ARB Base Rack
Used hardware and mounting instructions.
The Quick Release Bars should be installed into an additional Alloy Block Mount Kit from ARB. The kit comes with 4 pieces, this setup needs only 3.
For more information, check the Quick Release Bars manual
Defender 110 Roof Rack
Used hardware and mounting instructions.
All necessary hardware included.
For more information, check the Quick Release Bars manual
Front Runner / Dometic Slimline II
This setup requires a Front Runner/Dometic Slimline II Adapter per Quick Release Bar bar.
For more information, check the Quick Release Bars manual
Front Runner / Dometic Slimsport
Used hardware and mounting instructions.
All necessary hardware included.
For more information, check the Quick Release Bars manual
Hunters Plumb Adjustable Roof Rack
This setup requires a Hunters Plumb Adjustable Roof Rack Adapter per Quick Release Bar bar.
For more information, check the Quick Release Bars manual
Rhino-rack Pioneer Platform
Used hardware and mounting instructions.
All necessary hardware included.
For more information, check the Quick Release Bars manual
Sherpa Roof Rack
Used hardware and mounting instructions.
All necessary hardware included.
For more information, check the Quick Release Bars manual